Left Continue shopping
Your Order

You have no items in your cart

Blog

Altenew ECP (Level 1) – Seasonal Scene Building

Altenew ECP (Level 1) – Seasonal Scene Building

This is my 8th submission for the Altenew ECP Level 1. This class was successfully conducted by Nichol Magouirk. I found this class a bit challenging as it was not about individual images, but about creating a scene using stamps.

For my card I have used the Altenew Potted Plant Stamp, Rustic Linen Stamp and City Scene Stencil. Besides these I have also used a window die and a woodgrain stamp.

Firstly, I created the window scene of my card using the City Scene Stencil, and distress oxides in the colours Tumbled Glass, Broken China, Black Soot, Weathered Wood and Pumice Stone. I took a Neenah Solar White 80 lbs card stock and with the help of Picket Fence Studio Life Changing Brushes I created the city scene.

Next, as I wanted to give dimension to the window frame, I cut 3 die cuts from the window frame die. I layered these die cuts to create the widow frame and also stuck the 2 strips of paper cut separately, perpendicular to each other to complete the window frame. Once the frame was ready, I stuck the same on top of the city scene created earlier.

As the window itself is A2 size, I then decided to make this card a bit bigger. The base card stock measures 5.5” x 8.5”. I have used Neenah Solar White 110 lbs for the base, as it is really sturdy. To create the base, I stamped 80% of the top portion using the Rustic Linen Stamp and Pumice Stone oxide to give the wall effect. On the 20% bottom part of the card, I stamped using the wood grain stamp and Weathered Wood oxide to give the floor effect.

I then used the Potted Plant Stamp and Altenew inks in shades of greens to stamp the various images. I did fussy cut the images.

Once the images were ready, I first stuck the window frame to the base. Next, I arranged and stuck the various pots of plants using the foam squares, giving dimension as required.

Finally, I stamped and cut the sentiment “Have a Nice Day” from some Pearlized Vellum Paper and stuck on the card. This completed the card for me.

Thank you for stopping by once again…. Happy Crafting…

Read more
Altenew ECP (Level 1) – Easy Ink Blending Techniques

Altenew ECP (Level 1) – Easy Ink Blending Techniques

This is my 7th submission for AECP. The class was all about various Ink blending techniques, conducted by Amy Lee.

I love the Adore You Stamp Set from Altenew, which I have used here. I have combined two techniques taught by Amy in the class Emboss Resist and Ink blend a cardstock.

Firstly, I heat embossed the images on Canson Watercolor Paper using the Ranger Superfine Heat Embossing Powder, then I coloured the flowers and leaves using my blending tool and Altenew inks.

After coloring the flowers and leaves, as the Altenew inks are water based, I did take my water brush and applied another coat of inks to deepen the color in the shadow areas.

Once I was satisfied, I took an A2 size card base, stamped the dots background and the sentiment first. Then I assembled the flowers and leaves with the help of foam dots on the card base. To finish the card, I used some white sequence.

Thank you for stopping by…

Happy Crafting….

Neenah 80lb Classic Crest Cardstock
Shop at:
Krafters Cart
Scrapbook Adhesives 3D Foam Squares Variety Pack
Shop at:
Krafters Cart
Idea-Ology Design Ruler 12″
Shop at:
Krafters Cart
ORIGINAL MISTI LASER ETCHED
Shop at:
Krafters Cart
Neenah 110# Classic Crest Cardstock
Shop at:
Krafters Cart
VersaFine Pigment Ink Pad Onyx Black
Shop at:
Krafters Cart
GKD Connect Glue
GKD Connect Glue
Shop at:
Krafters Cart
EK Tools Mini Scoring Board
Shop at:
Krafters Cart
Large Teflon Bone Folder
Shop at:
Krafters Cart
Tim Holtz Guillotine Comfort Trimmer 8.5″
Shop at:
Krafters Cart
Altenew – Green Fields
Shop at:
Krafters Cart
Altenew – Summer Afternoon
Shop at:
Krafters Cart
Altenew – Pocketful of Sunshine Mini Ink Cube Set
Shop at:
Krafters Cart
Canson XL Watercolor Paper Pad 9″X12″
Shop at:
Krafters Cart
Tonic Studios Ultra Detail Craft Scissor
Shop at:
Krafters Cart
Junior T-Square 12″
Junior T-Square 12″
Shop at:
Krafters Cart
Crafters Companion – Go Machine
Shop at:
Krafters Cart
Altenew – Adore You Stamp Set
Shop at:
Krafters Cart
Ranger Embossing Powder Super Fine White
Shop at:
Krafters Cart
VersaMark Watermark Stamp Pad
Shop at:
Krafters Cart
Heat It Craft Tool
Heat It Craft Tool
Shop at:
Krafters Cart
Your Next Stamp Clear Stamps Lots Of Dots Edge
Shop at:
Krafters Cart
Read more
Altenew ECP (Level 1) – Let It Shine

Altenew ECP (Level 1) – Let It Shine

This is my 6th submission for the AECP. The class Let It Shine was conducted by Carissa Wiley and was very informative. It was all about shimmer and shine on the cards.

For this card, I first assembled the focal point for the card. As I wanted to use Deco foils and metallic cardstock for giving the shine to the card, I decided to cut an oval die-cut and other element using the Create a Wreath die-set from Altenew.

I did not want the metallic die-cuts to mix with the card base, so I stamped few leaves from Altenew Floral Shadow stamp set using Altenew Honey Drizzle and Caramel Toffee inks and fussy cut them as I do not have the co-ordinating dies.

I also stamped the sentiment using Altenew Label Love stamp set and layered it with Darice black fun foam.

For foiling on the card stock, I took a Neenah solar white #80 cardstock. I took an Altenew stencil Beveled Squares and Zig Jumbo Glue Pen. First, I taped the cardstock to the stencil. Next, I applied the Zig Glue Pen. Once I was satisfied, I quickly removed the stencil and pressed a piece of Deco Foil Specialty Transfer Sheets Iridescent. I then, cleaned my stencil under running tap water.

Next, I took the card stock and passed it through my die-cut machine, so that the foil pressed down to the card stock completely. I then peeled off the foil to reveal the stunning foiled cardstock.

Foiled cardstock under lights

Foiled cardstock under dimmed lights

For completing the card, I took an A2 size Neenah Solar White #110 cardstock. To match the leaves, I first coloured the right side of the base using Altenew Honey Drizzle ink. I then matted the foiled card stock with a black cardstock and adhered this piece to the card base.

To finish the card, I then arranged all the elements as shown in the pic.

Hope you like this card, all the supplies I have used are linked below.

Thank you for stopping by…

Happy Crafting,

Meetu

Neenah 80lb Classic Crest Cardstock
Shop at:
Krafters Cart
Scrapbook Adhesives 3D Foam Squares Variety Pack
Shop at:
Krafters Cart
Idea-Ology Design Ruler 12″
Shop at:
Krafters Cart
ORIGINAL MISTI LASER ETCHED
Shop at:
Krafters Cart
Neenah 110# Classic Crest Cardstock
Shop at:
Krafters Cart
VersaFine Pigment Ink Pad Onyx Black
Shop at:
Krafters Cart
GKD Connect Glue
GKD Connect Glue
Shop at:
Krafters Cart
EK Tools Mini Scoring Board
Shop at:
Krafters Cart
Large Teflon Bone Folder
Shop at:
Krafters Cart
Tim Holtz Guillotine Comfort Trimmer 8.5″
Shop at:
Krafters Cart
Altenew – Summer Afternoon
Shop at:
Krafters Cart
Altenew – Pocketful of Sunshine Mini Ink Cube Set
Shop at:
Krafters Cart
Tonic Studios Ultra Detail Craft Scissor
Shop at:
Krafters Cart
Altenew – Create-A-Wreath Die Set
Shop at:
Krafters Cart
Junior T-Square 12″
Junior T-Square 12″
Shop at:
Krafters Cart
Tonic Studios Mirror Glossy Cardstock 8.5″X11″ 5/Pkg Polished Gold
Shop at:
Krafters Cart
Crafters Companion – Go Machine
Shop at:
Krafters Cart
Read more
Simon Says Stamp - Beautiful Flowers

Simon Says Stamp - Beautiful Flowers

I just love this stamp set from Simon Says Stamp. I have basically coloured them on two different card stocks… Canson Watercolor Cold Press 140 lb (Left side) and Ranger Watercolor Paper (Right side). I have used Tombow markers for colouring the blooms.


For this one, I first stamped the stamp on Canson watercolor paper and colo

For this one, I first stamped the bloom on Canson watercolor paper and then used the Tombow markers to colour it. Once I was happy with the result, I used my Brother Scan ‘n’ Cut to cut the image as I do not have the matching die set.

For the card base I took an A2 size top folded Neenah Solar White #110 cardstock. As I wanted the image to be the focal point of my card, I just gave some texture to the background using a stencil and embossing paste. Once the paste dried, I stuck the bloom die-cut to the base.

For the sentiment on the card, I used Avery Elle Sentimental Die and cut the thanks sentiment from Tonic Mirror Card stock.

To finish the card, I used some Pretty Pink Posh Watermelon drops.

I stamped the image for this card on Ranger Watercolor Paper, coloured and cut the same as above.

Again, for the card base I took an A2 size top folded Neenah Solar White #110 cardstock. For this one, I diluted some Dylusion Spray with lots of water and gave a wash to the base. Once the background dried, I took some undiluted spray on my fan brush and splattered it on the card base. I also coloured a strip on right hand side with the tombow marker to break the background.

Once I was happy with the base, I adhered the bloom to the base with foam squares. For the sentiment I heat embossed the word thanks using some Ranger Superfine Gold Embossing Powder.

To finish this card too, I used the PPP Watermelon Jewel Drops.

Thanks for stopping by….

Meetu

Scrapbook Adhesives 3D Foam Squares Variety Pack
Shop at:
Krafters Cart
Idea-Ology Design Ruler 12″
Shop at:
Krafters Cart
ORIGINAL MISTI LASER ETCHED
Shop at:
Krafters Cart
Neenah 110# Classic Crest Cardstock
Shop at:
Krafters Cart
Dreamweaver Embossing Paste 4oz Regular
Shop at:
Krafters Cart
GKD Connect Glue
GKD Connect Glue
Shop at:
Krafters Cart
EK Tools Mini Scoring Board
Shop at:
Krafters Cart
Large Teflon Bone Folder
Shop at:
Krafters Cart
Tim Holtz Guillotine Comfort Trimmer 8.5″
Shop at:
Krafters Cart
Canson XL Watercolor Paper Pad 9″X12″
Shop at:
Krafters Cart
Tombow Dual Brush Markers 10/Pkg Primary
Shop at:
Krafters Cart
GKD Amalgam Ink Pad- Jet Black
Shop at:
Krafters Cart
Tonic Studios Ultra Detail Craft Scissor
Shop at:
Krafters Cart
Junior T-Square 12″
Junior T-Square 12″
Shop at:
Krafters Cart
Avery Elle –  Die Sentimental Elements
Avery Elle – Die Sentimental Elements
Shop at:
Krafters Cart
Tonic Studios Mirror Glossy Cardstock 8.5″X11″ 5/Pkg Polished Gold
Shop at:
Krafters Cart
Dina Wakley – Media Palette Knives
Shop at:
Krafters Cart
Pretty Pink Posh – Watermelon Jewels
Shop at:
Krafters Cart
Crafters Companion – Go Machine
Shop at:
Krafters Cart
Ranger Embossing Powder Super Fine Gold
Shop at:
Krafters Cart
Bob Ross Fan Blender Brush Size 3
Shop at:
Krafters Cart
Inkssentials Watercolor Paper 10/Pkg White 8.5″X11″
Shop at:
Krafters Cart
Read more
Altenew ECP (Level 1) - For The Guys

Altenew ECP (Level 1) - For The Guys

Another amazing class by Jennifer Rzasa… I combined the two lessons Geometrics and Cards for Boys and came up with this. I had to really give a lot of thinking for this card and really happy with the end result.

For this card I have used the Altenew Trigonometry Stamp Set, Altenew Tall Alpha Stamp Set and Altenew Fine Alphabet Die Set.

First, I took a Neenah Solar White #80 cardstock measuring 4″ x 5 1/4″. With the help of MISTI, I aligned the different triangles from the Trigonometry Stamp set and stamped them on the card base using Altenew Morning Frost Ink. I stamped the image row wise. For the last row, I stamped one of the triangles using the Altenew Sea Glass Ink.

Once the card base was stamped, I then took another Neenah Solar White #80 cardstock and coloured the same fully using the Sea Glass Ink. I applied the ink pad directly to the paper. I then took the Altenew Fine Alpha Die and cut all the alphabets in the word HIGHLIGHT twice. To make the word HIGHLIGHT pop, I stuck 2 layers of each alphabet.

With the help of MISTI again, and using the Tall Alpha Stamp set, I created and stamped the sentiment on the background (YOU ARE THE…. OF MY DAY). I used GinaK Amalgam ink to stamp the sentiment.

After stamping, I adhered the word HIGHLIGHT to complete the sentiment. The T-square ruler really helped me in aligning the sentiment straight on the card base.

Lastly, I stuck this ready piece, to a top folding standard A2 Neenah Solar White Cardstock #110 using the Foam squares.

Hope you liked the card. Thank you for stopping by…
Happy Crafting,
Meetu

Neenah 80lb Classic Crest Cardstock
Shop at:
Krafters Cart
Scrapbook Adhesives 3D Foam Squares Variety Pack
Shop at:
Krafters Cart
Idea-Ology Design Ruler 12″
Shop at:
Krafters Cart
ORIGINAL MISTI LASER ETCHED
Shop at:
Krafters Cart
Neenah 110# Classic Crest Cardstock
Shop at:
Krafters Cart
GKD Connect Glue
GKD Connect Glue
Shop at:
Krafters Cart
EK Tools Mini Scoring Board
Shop at:
Krafters Cart
Large Teflon Bone Folder
Shop at:
Krafters Cart
Tim Holtz Guillotine Comfort Trimmer 8.5″
Shop at:
Krafters Cart
GKD Amalgam Ink Pad- Jet Black
Shop at:
Krafters Cart
Altenew – Cool Summer Night Mini Set
Shop at:
Krafters Cart
Altenew – Warm Gray Mini set
Shop at:
Krafters Cart
Altenew – Trigonometry Stamp Set
Shop at:
Krafters Cart
Altenew – Fine Alphabet Die Set
Shop at:
Krafters Cart
Altenew – Tall Alpha Stamp Set
Shop at:
Krafters Cart
Junior T-Square 12″
Junior T-Square 12″
Shop at:
Krafters Cart
Read more
Altenew ECP (Level 1) - Celebration: Stencil Techniques

Altenew ECP (Level 1) - Celebration: Stencil Techniques

Submission number 5, for the class conducted by Laurel Beard. I used a stencil and embossing paste for creating additional interest to the background.

For this card, I first stamped the Spring Daisy flowers and leaves on the Canson Watercolour Paper. Using the Tombow markers I coloured the images and then fussy-cut them.

For the card base I took a top folded 5 ½” x 4 ¼” Neenah Solar White Cardstock #110. For adding interest to background, I used the MFT stencil and some embossing paste to create the radiating rays’ texture on the card base.

Once the embossing paste had dried, I adhered the flower images to the card base.

Finally, I cut the Happy sentiment from black card stock using the Halftone Happy Die and also stamped the word Birthday from the same stamp set on a white strip. I then assembled the card as shown in the pic above.

Lastly, to finish it all I added some PPP Metallic Rose Gold Jewels.

Thank you for stopping by…. Happy crafting…

Meetu

Idea-Ology Design Ruler 12″
Shop at:
Krafters Cart
ORIGINAL MISTI LASER ETCHED
Shop at:
Krafters Cart
Neenah 110# Classic Crest Cardstock
Shop at:
Krafters Cart
Dreamweaver Embossing Paste 4oz Regular
Shop at:
Krafters Cart
GKD Connect Glue
GKD Connect Glue
Shop at:
Krafters Cart
EK Tools Mini Scoring Board
Shop at:
Krafters Cart
Large Teflon Bone Folder
Shop at:
Krafters Cart
Tim Holtz Guillotine Comfort Trimmer 8.5″
Shop at:
Krafters Cart
Canson XL Watercolor Paper Pad 9″X12″
Shop at:
Krafters Cart
Tombow Dual Brush Markers 10/Pkg Primary
Shop at:
Krafters Cart
GKD Amalgam Ink Pad- Jet Black
Shop at:
Krafters Cart
Tonic Studios Ultra Detail Craft Scissor
Shop at:
Krafters Cart
Junior T-Square 12″
Junior T-Square 12″
Shop at:
Krafters Cart
MFT – Stencil Radiating Rays
Shop at:
Krafters Cart
Altenew – Spring Daisy Stamp Set
Shop at:
Krafters Cart
Altenew – Halftone Happy Stamp Set
Shop at:
Krafters Cart
Altenew – Happy Die
Altenew – Happy Die
Shop at:
Krafters Cart
Pretty Pink Posh – Metallic Rose Gold Jewels
Shop at:
Krafters Cart
Read more
Altenew ECP (Level 1) - Clean & Simple Boutique Cards

Altenew ECP (Level 1) - Clean & Simple Boutique Cards

Submission Number 3, there is a lesson in this class about Luxury Papers. I have used silver metallic paper to create an additional interest in the card. This class was conducted beautifully by Jennifer Rasa and she gave some very useful tips and tricks.

I have used the Altenew Blooming Bouquet stamp set. Firstly, I stamped the floral image using GinaK Amalgam ink on Canson Watercolour paper as I wanted to colour the image using the Tombow markers.

After colouring the image, I fussy-cut the image using the Tonic Studios Ultra Detail Craft Scissors. For creating the extra interest in the card, I then cut a Circle Frame using the Altenew – Create-A-Wreath Die Set from a Silver Metallic card-stock.

After creating all the elements, I took a top folding 4 ¼” x 5 ½” card base (Neenah Solar White #110). I first stuck the frame as seen in the pic, then with the help of MISTI tool, I stamped the Hello sentiment. Next, using some foam squares, I adhered the image on the Circle Frame.

Lastly, to finish the card, I added some PPP Lemon Drop Jewels.

Hope you like the card and thanks for stopping.
Happy Crafting…
Meetu

Scrapbook Adhesives 3D Foam Squares Variety Pack
Shop at:
Krafters Cart
Idea-Ology Design Ruler 12″
Shop at:
Krafters Cart
ORIGINAL MISTI LASER ETCHED
Shop at:
Krafters Cart
Neenah 110# Classic Crest Cardstock
Shop at:
Krafters Cart
GKD Connect Glue
GKD Connect Glue
Shop at:
Krafters Cart
EK Tools Mini Scoring Board
Shop at:
Krafters Cart
Large Teflon Bone Folder
Shop at:
Krafters Cart
Tim Holtz Guillotine Comfort Trimmer 8.5″
Shop at:
Krafters Cart
Altenew – Green Fields
Shop at:
Krafters Cart
Pretty Pink Posh – Lemon Drop Jewels
Shop at:
Krafters Cart
Canson XL Watercolor Paper Pad 9″X12″
Shop at:
Krafters Cart
Tombow Dual Brush Markers 10/Pkg Primary
Shop at:
Krafters Cart
Tonic Studios Mirror Glossy Cardstock 8.5″X11″ 5/Pkg Chrome Silver
Shop at:
Krafters Cart
Altenew – Blooming Bouquet Stamp Set
Shop at:
Krafters Cart
GKD Amalgam Ink Pad- Jet Black
Shop at:
Krafters Cart
Tonic Studios Ultra Detail Craft Scissor
Shop at:
Krafters Cart
Altenew – Create-A-Wreath Die Set
Shop at:
Krafters Cart
Read more
Altenew ECP (Level 1) – All About Layering 1

Altenew ECP (Level 1) – All About Layering 1

This is my second submission for the AEP. This is based on the class by Nicole Picadura. I have used the technique of Generation Stamping to get the different shades from one ink pad.

For this card, I have just used the only the Jet-Black ink from Altenew for the different layers of the Altenew Remember This stamp set.
I took the Neenah Solar white #80 cardstock measuring 3 5/8” x 4 7/8”.

Firstly, I stamped the outline of the flower using the first-generation stamping. Once I was happy with the placement of the first layer, then I stamped the second layer using the second-generation stamping.

After stamping all the flowers, I coloured the background using Copic Markers N0 and N3. This completed the card base for me.

For the sentiment, I used the Super Script Stamp and die. I stamped the sentiment on a red cardstock and then used the die to cut the same.

Finally, I matted the card base on a red cardstock, then a black one. This base then I adhered to a top folding card base measuring 4 ¼” x 5 ½”.

All the supplies are mentioned at the bottom.

Thank you for stopping by….
Happy Crafting…
Meetu

Neenah 80lb Classic Crest Cardstock
Shop at:
Krafters Cart
Idea-Ology Design Ruler 12″
Shop at:
Krafters Cart
Sizzix Stamper’s Secret Weapon
Shop at:
Krafters Cart
Neenah 110# Classic Crest Cardstock
Shop at:
Krafters Cart
GKD Connect Glue
GKD Connect Glue
Shop at:
Krafters Cart
EK Tools Mini Scoring Board
Shop at:
Krafters Cart
Large Teflon Bone Folder
Shop at:
Krafters Cart
Tim Holtz Guillotine Comfort Trimmer 8.5″
Shop at:
Krafters Cart
Altenew – Green Fields
Shop at:
Krafters Cart
Altenew – Remember This Stamp Set
Shop at:
Krafters Cart
Altenew – Super Script Stamp Set
Shop at:
Krafters Cart
Altenew – Super Script Die Set
Shop at:
Krafters Cart
Read more
Altenew ECP (Level 1) - All About Layering 2

Altenew ECP (Level 1) - All About Layering 2

It was in March 2018, I was accepted for this program, but due to time constraints I was not able to pursue it. Finally, as people say… time will always be less… one has to create time for their dreams….

So here I am taking the first step….


All About Layering 1 and 2 are both being taught by Nicole Picadura. She conducted the classes beautifully and I learnt a lot.

I have used Altenew Beautiful Day Stamp set for completing this lesson along with Mega Greetings Stamp Set.

I took a Neenah Solar White #110 card stock measuring 5 1/2″ x 4 1/8″ and did basic layered stamping using the Beautiful Day Stamp set. For the flowers I used 4 inkpads Citrus Burst, Fresh Cream, Honey Drizzle from the Pocketful of Sunshine Set and Caramel Toffee from the Summer Afternoon Set. For the leaves I used the Green Fields set.

I did mask the images as required. Once I was satisfied with my focal image, I stamped the thanks sentiment using Versafine Onyx Black ink.

I then took a ready Neenah Solar White #110 card base measuring 5 1/2″ x 4 1/4”. For breaking the plain background, I coloured the bottom tip of the card base using the Honey Drizzle ink. Once done I adhered my stamped cardstock to the card base. For the finish I did use some Lemon Drop Jewels too.

All the supplies I have used are mentioned below.

Hope you like the card as much as I enjoyed creating it.

Thank you for stopping by…. Happy Crafting

Meetu

Idea-Ology Design Ruler 12″
Shop at:
Krafters Cart
ORIGINAL MISTI LASER ETCHED
Shop at:
Krafters Cart
Neenah 110# Classic Crest Cardstock
Shop at:
Krafters Cart
VersaFine Pigment Ink Pad Onyx Black
Shop at:
Krafters Cart
Altenew – Mega Greetings Stamp Set
Shop at:
Krafters Cart
Altenew – Beautiful Day Stamp Set
Shop at:
Krafters Cart
GKD Connect Glue
GKD Connect Glue
Shop at:
Krafters Cart
Inkadinkado Stamping Mask Paper
Shop at:
Krafters Cart
EK Tools Mini Scoring Board
Shop at:
Krafters Cart
Large Teflon Bone Folder
Shop at:
Krafters Cart
Tim Holtz Guillotine Comfort Trimmer 8.5″
Shop at:
Krafters Cart
Altenew – Green Fields
Shop at:
Krafters Cart
Altenew – Summer Afternoon
Shop at:
Krafters Cart
Altenew – Pocketful of Sunshine Mini Ink Cube Set
Shop at:
Krafters Cart
Pretty Pink Posh – Lemon Drop Jewels
Shop at:
Krafters Cart
Read more
Beautiful Flowers 2

Beautiful Flowers 2

Hello,

Today I have created this card using the Simon Says Stamps Beautiful Flowers 2.

First I stamped the image using Verafine Onyx Black Ink and used my Polychromos to color it.

Then I prepared an A2 size card base and used the stencil and the embossing paste to create some textures. I also cut the sendtiment using some black card stock. I assembled the card as shown in the pic. Finally I used the jewels to add some interest to the base.

Thank you for stopping by…

Happy Crafting…

Meetu

ORIGINAL MISTI LASER ETCHED
Shop at:
Krafters Cart
Neenah 110# Classic Crest Cardstock
Shop at:
Krafters Cart
Dreamweaver Embossing Paste 4oz Regular
Shop at:
Krafters Cart
Altenew – Feeling Dotty Stencil
Shop at:
Krafters Cart
Simon Says Clear Stamps Beautiful Flowers 2
Shop at:
Krafters Cart
Simon Says Stamp Happy Birthday Script
Shop at:
Krafters Cart
Pretty Pink Posh – Ivory Jewels
Shop at:
Krafters Cart
VersaFine Pigment Ink Pad Onyx Black
Shop at:
Krafters Cart
Read more
Flower Making Card Stock and Grooved Golf Tools

Flower Making Card Stock and Grooved Golf Tools

As a crafter and store owner, I am asked about the best paper to use for three dimensional flowers all the time.

I did experiment, with lots of brands, before choosing the one which worked for me personally. Out of all the choices I had, The Secret Garden Flower Making Paper appealed the most. This paper is being manufactured and marketed by Get Inspired! brand from India.

The best thing I liked about this paper is that even though it is thick, it takes very less pressure to emboss and mould it.

I applied very less pressure with the embossing and the grooved golf tools to get beautiful results.

So here is a short video about using these papers and the grooved golf tools….


Read more

MFT - Flashy Florals and Distressed Patterns

Hello,

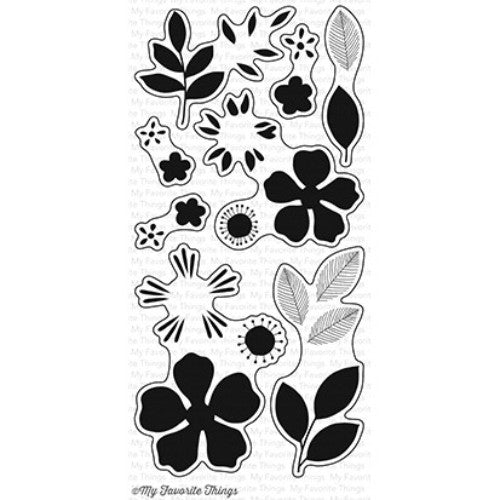
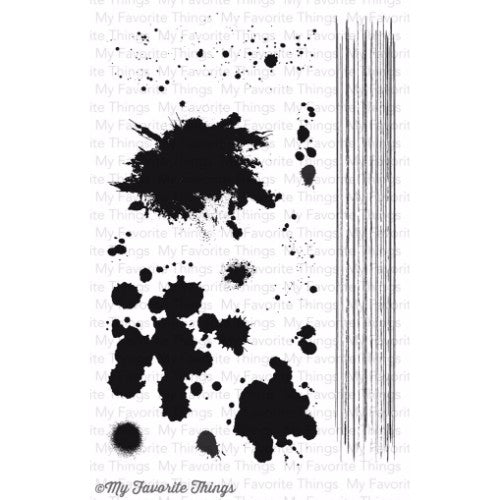
Today I have made a card using the Flashy Florals and Distressed Patterns stamp sets from MFT. I have been hoarding this stamp set for long and really wanted to have a go at it…

Here is the process video and please do comment below if you have any queries… I will try and answer them..

Here are some close-up pictures

All the supplies, I have used are linked below… Thanks for reading my post and also for watching the video.

Happy Crafting…

Meetu

Neenah 80lb Classic Crest Cardstock
Tim Holtz Non-Stick Micro Serrated Mini Snips 5″
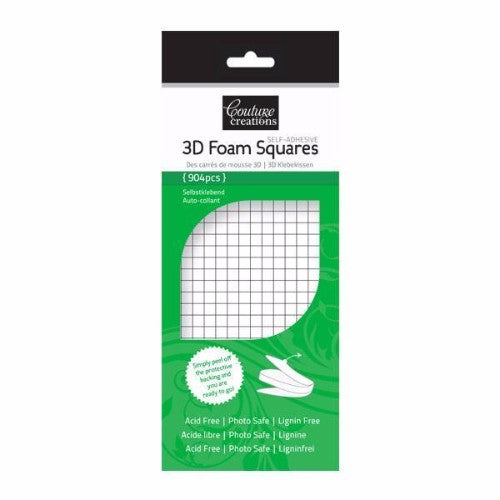
Couture Creations – 3D Foam Squares
Sizzix Stamper’s Secret Weapon
Apple Pie Memories Acrylic Stamp Block W/Alignment Grid 3″X4″X.5″
Apple Pie Memories Acrylic Stamp Block W/Alignment Grid
MFT – Flashy Florals
MFT – Distressed Patterns
VersaMark Watermark Stamp Pad
Altenew – Green Fields
Embossing Powder Super Fine White
Couture Creations – Multi-Purpose Heat Tool
Goodbye Static! Anti-Static Pad
ORIGINAL MISTI
ORIGINAL MISTI
Embossing Powder Super Fine Gold
Inkssentials Glossy Accents
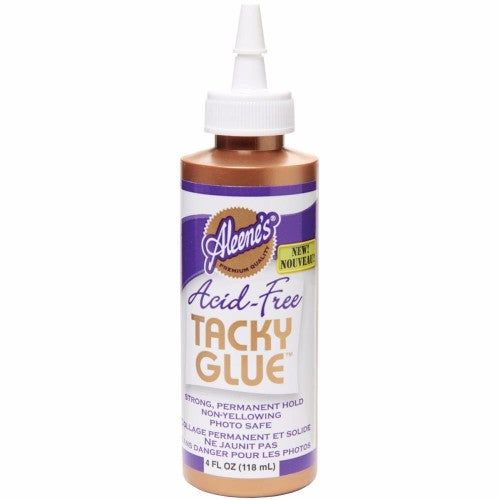
Aleene’s Acid-Free Tacky Glue
Read more
63 results